
Windows 10 and Windows 11 ship with a feature known as the Windows OCR under the hood. Windows OCR, short for Windows Optical Character Recognition, is a pretty nifty ability since it can be used by apps to lift the text from the pixels in images and copy it to your clipboard.
Unfortunately, though there’s no system Windows apps leverage the OCR feature. You’ll need to download a extra app from the Microsoft Store that’s specially designed to use the OCR. The best Windows OCR app is Text Grab by Joe FinApps, and we’ll show you how to use it today.
To get started with using the Windows OCR, you’ll want to head to the Microsoft Store on Windows 10 and Windows 11. Search for Text Grab and download the app. We’ve also linked the app at the bottom of this post for you to discover the app more easily. You can then dive into the steps below.
- Launch Text Grab from your Start Menu
- For the initial boot only, choose how you want to use Text Grab each time you boot the app. For most people, we suggest Full-Screen. But we’ve also highlighted the other options below.
- You can choose Full-Screen, which works like a screenshot tool, giving you a rectangular selection tool to copy text. Note in this example, we’ll use Full-Screen.
- You can choose Grab Frame, which is an overlay for picking and finding text on the screen. It will stay on top of other windows and read text in the border.
- You can use Edit Text, which is a space to edit text, and works like Notepad
- You can also choose Quick Simple Lookup, which is an editable list of of text items that you can search and copy.

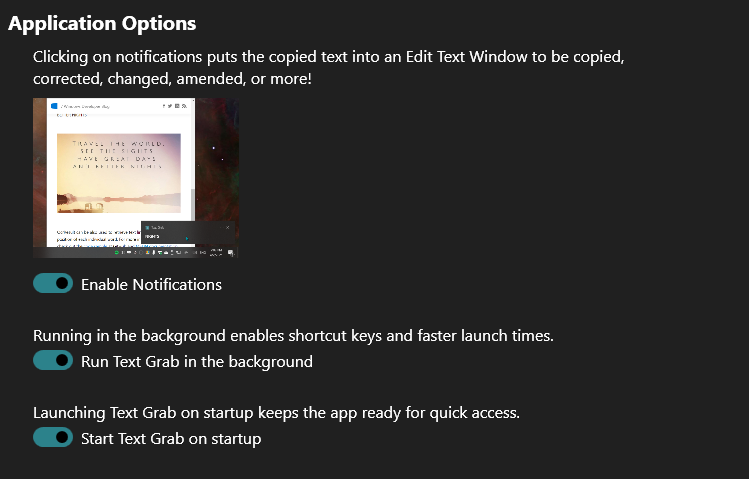
- Scroll all the way to the bottom of the app. Choose the options for Run Text Grab in the background and Start Text Grab on startup so you can access the app more easily. With these settings you can use the hotkey Windows Key, Shift, and F to start a Fullscreen grab once the app is running.
- When complete, press Okay to boot the application. At anytime, you can exit the initial full screen grab by pressing ESC. You can also right-click on the Text Grab Icon in the Taskbar to get back to the settings if you want. Or to switch to the other modes.

- Open the item you want to grab text from.
- Launch Text Grab if you’re not already running it. You should see the full-screen experience, and a cross-hair to drag and copy text. If not, right-click on the icon and choose Fullscreen Grab. Or, use the keyboard shortcut setup earlier.
- Drag the crosshair around what you want to copy.

- The text will be copied to your clipboard and you can paste it into your favorite app.
That’s it! There’s not much to using the Windows OCR with Text Grab. Once you set up the application and get running, things should be pretty easy. There’s not many technical aspects, and Text Grab makes using the Windows OCR very easy!


Is there a way to change the shortcut?
LikeLike
Yes! Right click on the icon and select “Settings”
On the left hand side pick the page for “Keys”
Find the shortcut you wish to change in the list
Click record
press the key combination you want to use
Click record again to be done
LikeLike